How to Export Your Google AI Studio Project to GitHub
This guide is the easiest way to take the code generated by Google AI Studio (Gemini) and turn it into a permanent project that you can save, edit, and share with the world.
Overview
Google AI Studio is incredible for “Vibe Coding”—asking Gemini to build a React app, a game, or a tool in seconds. However, AI Studio is a sandbox; to own your code and build upon it, you need to move it to GitHub.
The Workflow:
- Create: Generate your app in AI Studio (Build Mode).
- Export: Push the code directly to GitHub with one click.
- Refine: Clone it to your computer (VS Code/Cursor) to develop further.
📝 Important Note: This guide focuses on the “Build” mode (creating full apps/websites). If your app uses API keys (like the Gemini API), remember that for security reasons, you should never commit these keys directly to GitHub. We will touch on how to handle this in the Local Setup step.
Prerequisites
- A Google AI Studio account.
- A GitHub account.
- VS Code or Cursor installed on your computer.
- Node.js installed locally (Version 18+ recommended).
Migration Overview
This plan moves you from a temporary AI generation to a professional development environment.
- Source: Google AI Studio (Gemini 2.0 Flash/Pro).
- Bridge: AI Studio GitHub Integration.
- Destination: Your GitHub Repository.
Step 1: Create Your App in AI Studio
Before you can export, you need a project. We will use the Build feature (sometimes called “Vibe Coding”) to generate a full application.
- Enter Build Mode:
- Go to Google AI Studio.
- Click Create New and select App (or ensure the toggle at the top is set to “Build” rather than “Prompt”).
- Prompt the AI:
- Type your request (e.g., “Create a Pomodoro timer with a cyberpunk aesthetic using React and Tailwind”).
- Wait for the preview to load on the right side.
- Refine (Optional):
- Chat with Gemini to tweak the design (e.g., “Make the start button green”).
- Once you are happy with the preview, you are ready to export.
Step 2: Push Code to GitHub
Now that your code is ready, you will move it from the Google sandbox to your own version control system.
-
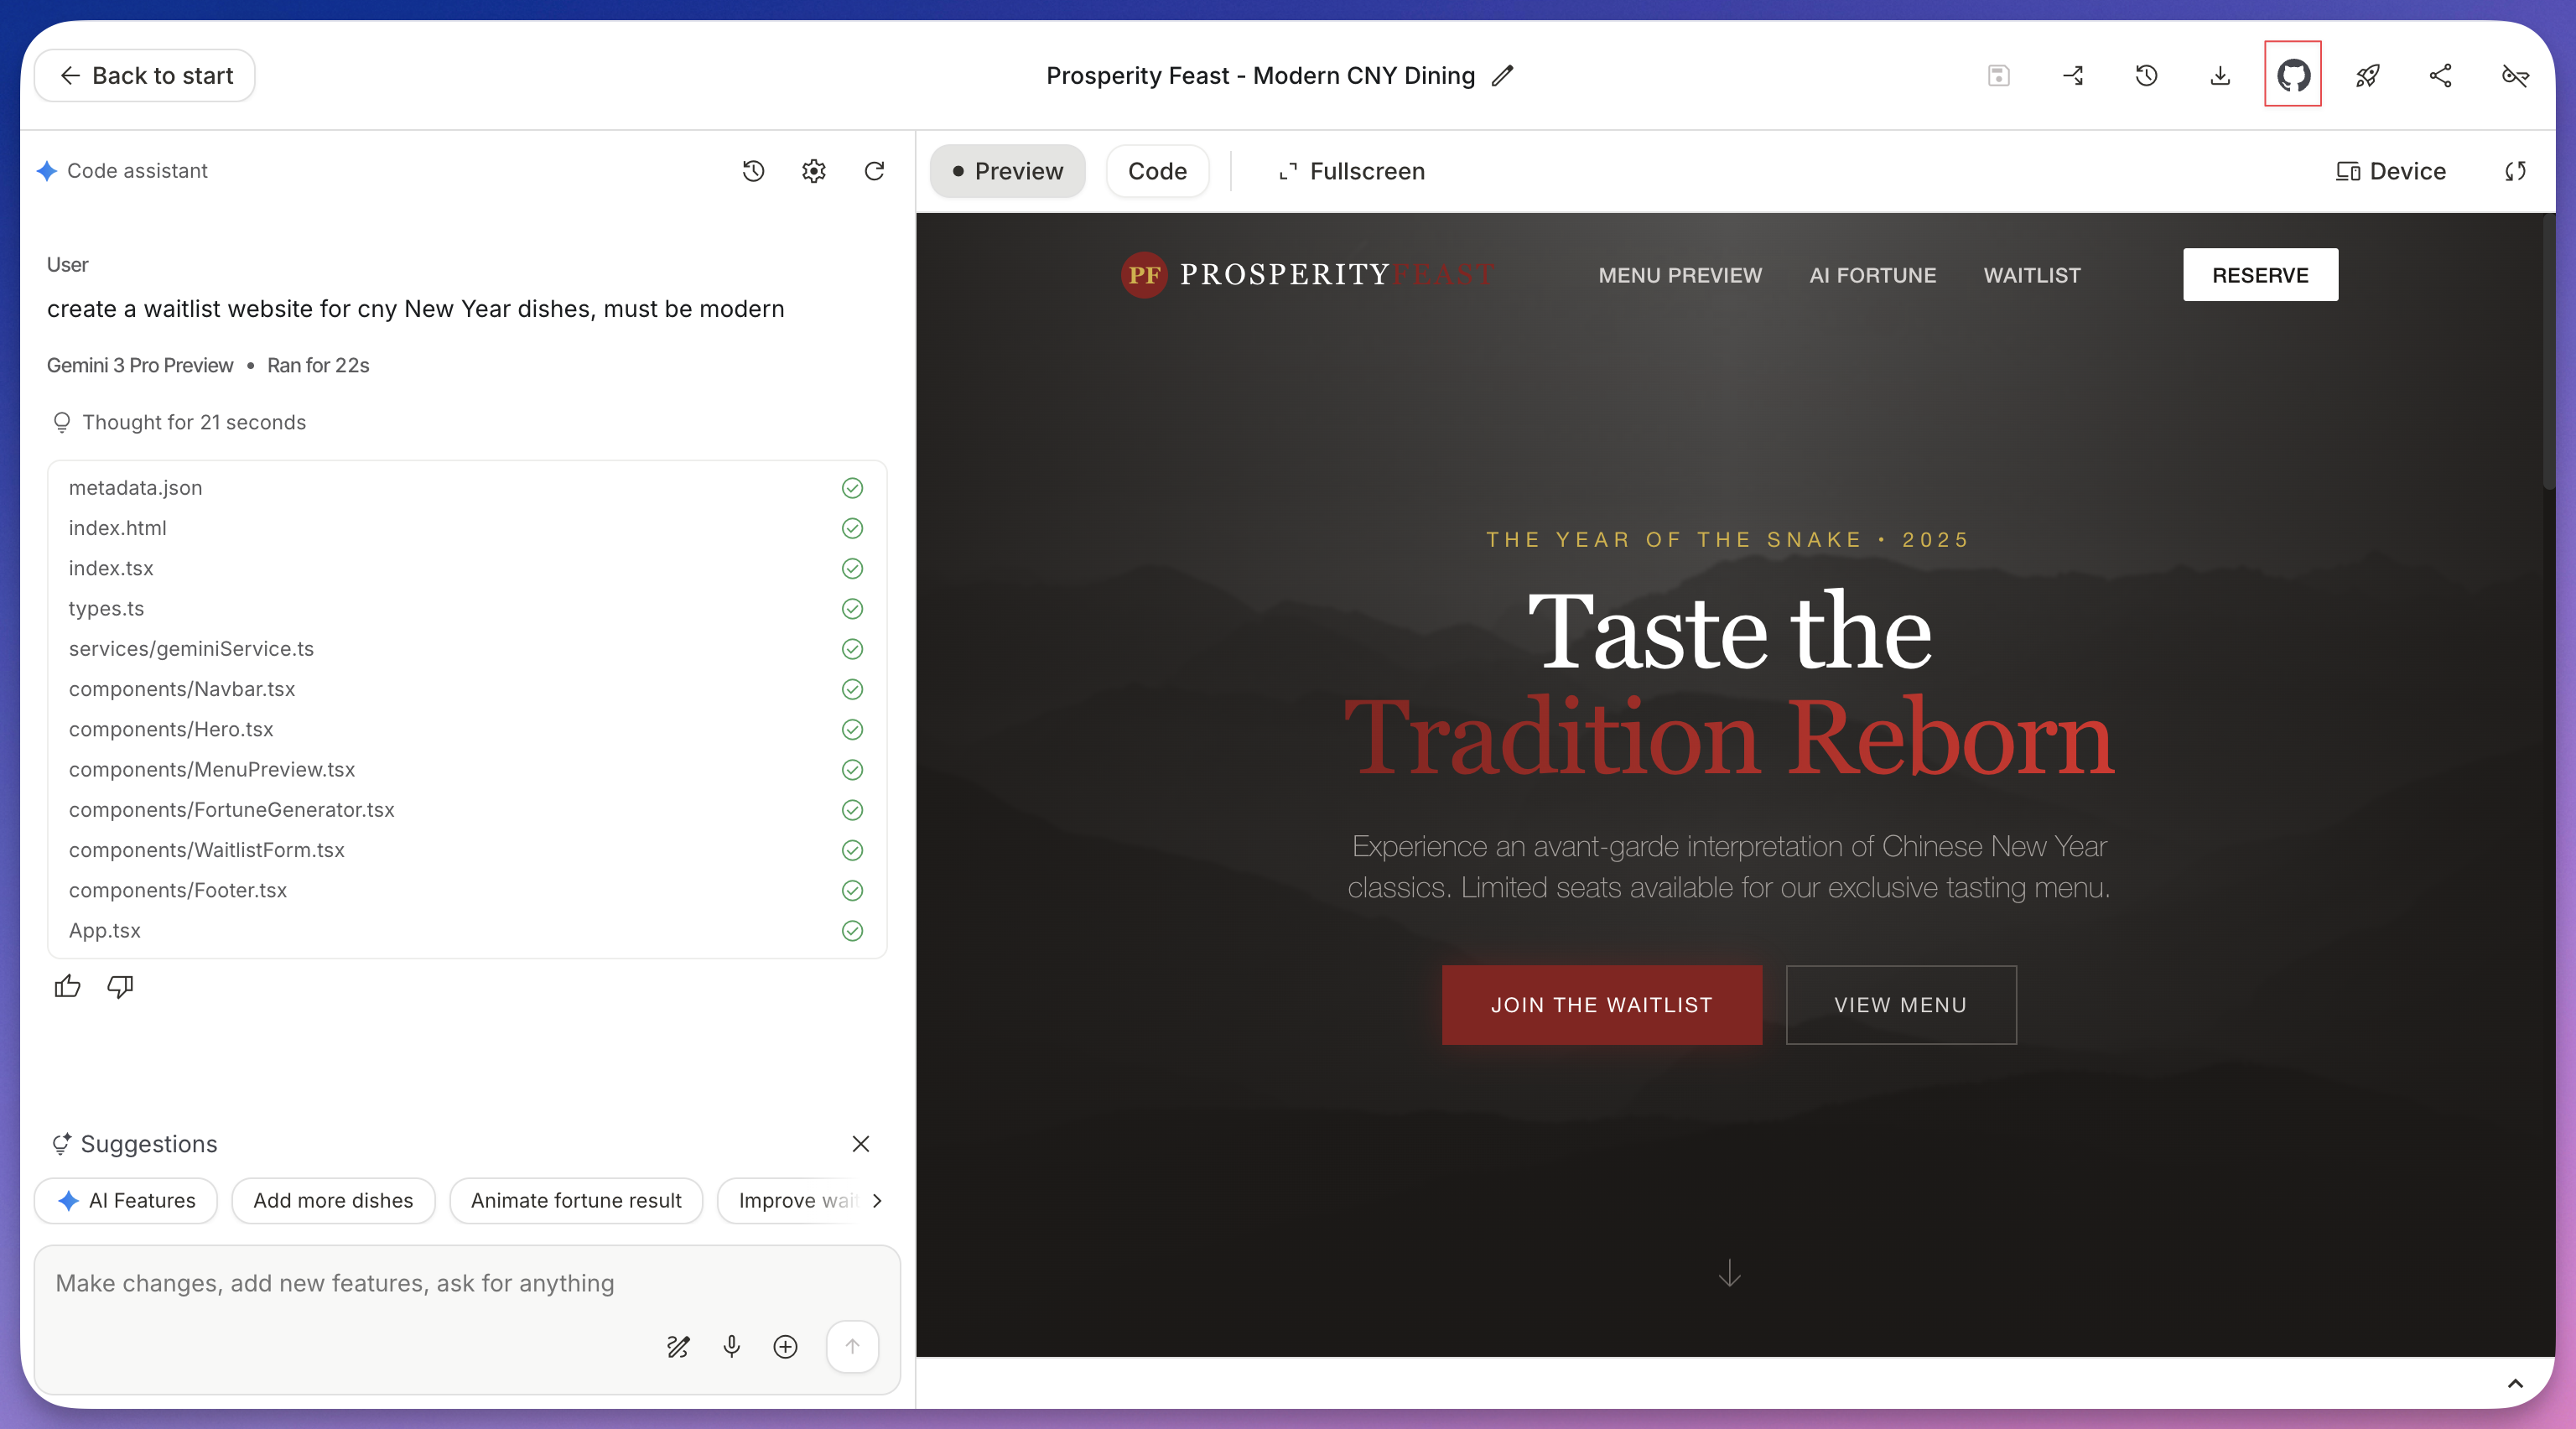
Locate the GitHub Integration:
- Look at the header bar above the code/preview pane.
- Click the GitHub icon (the cat silhouette).
-
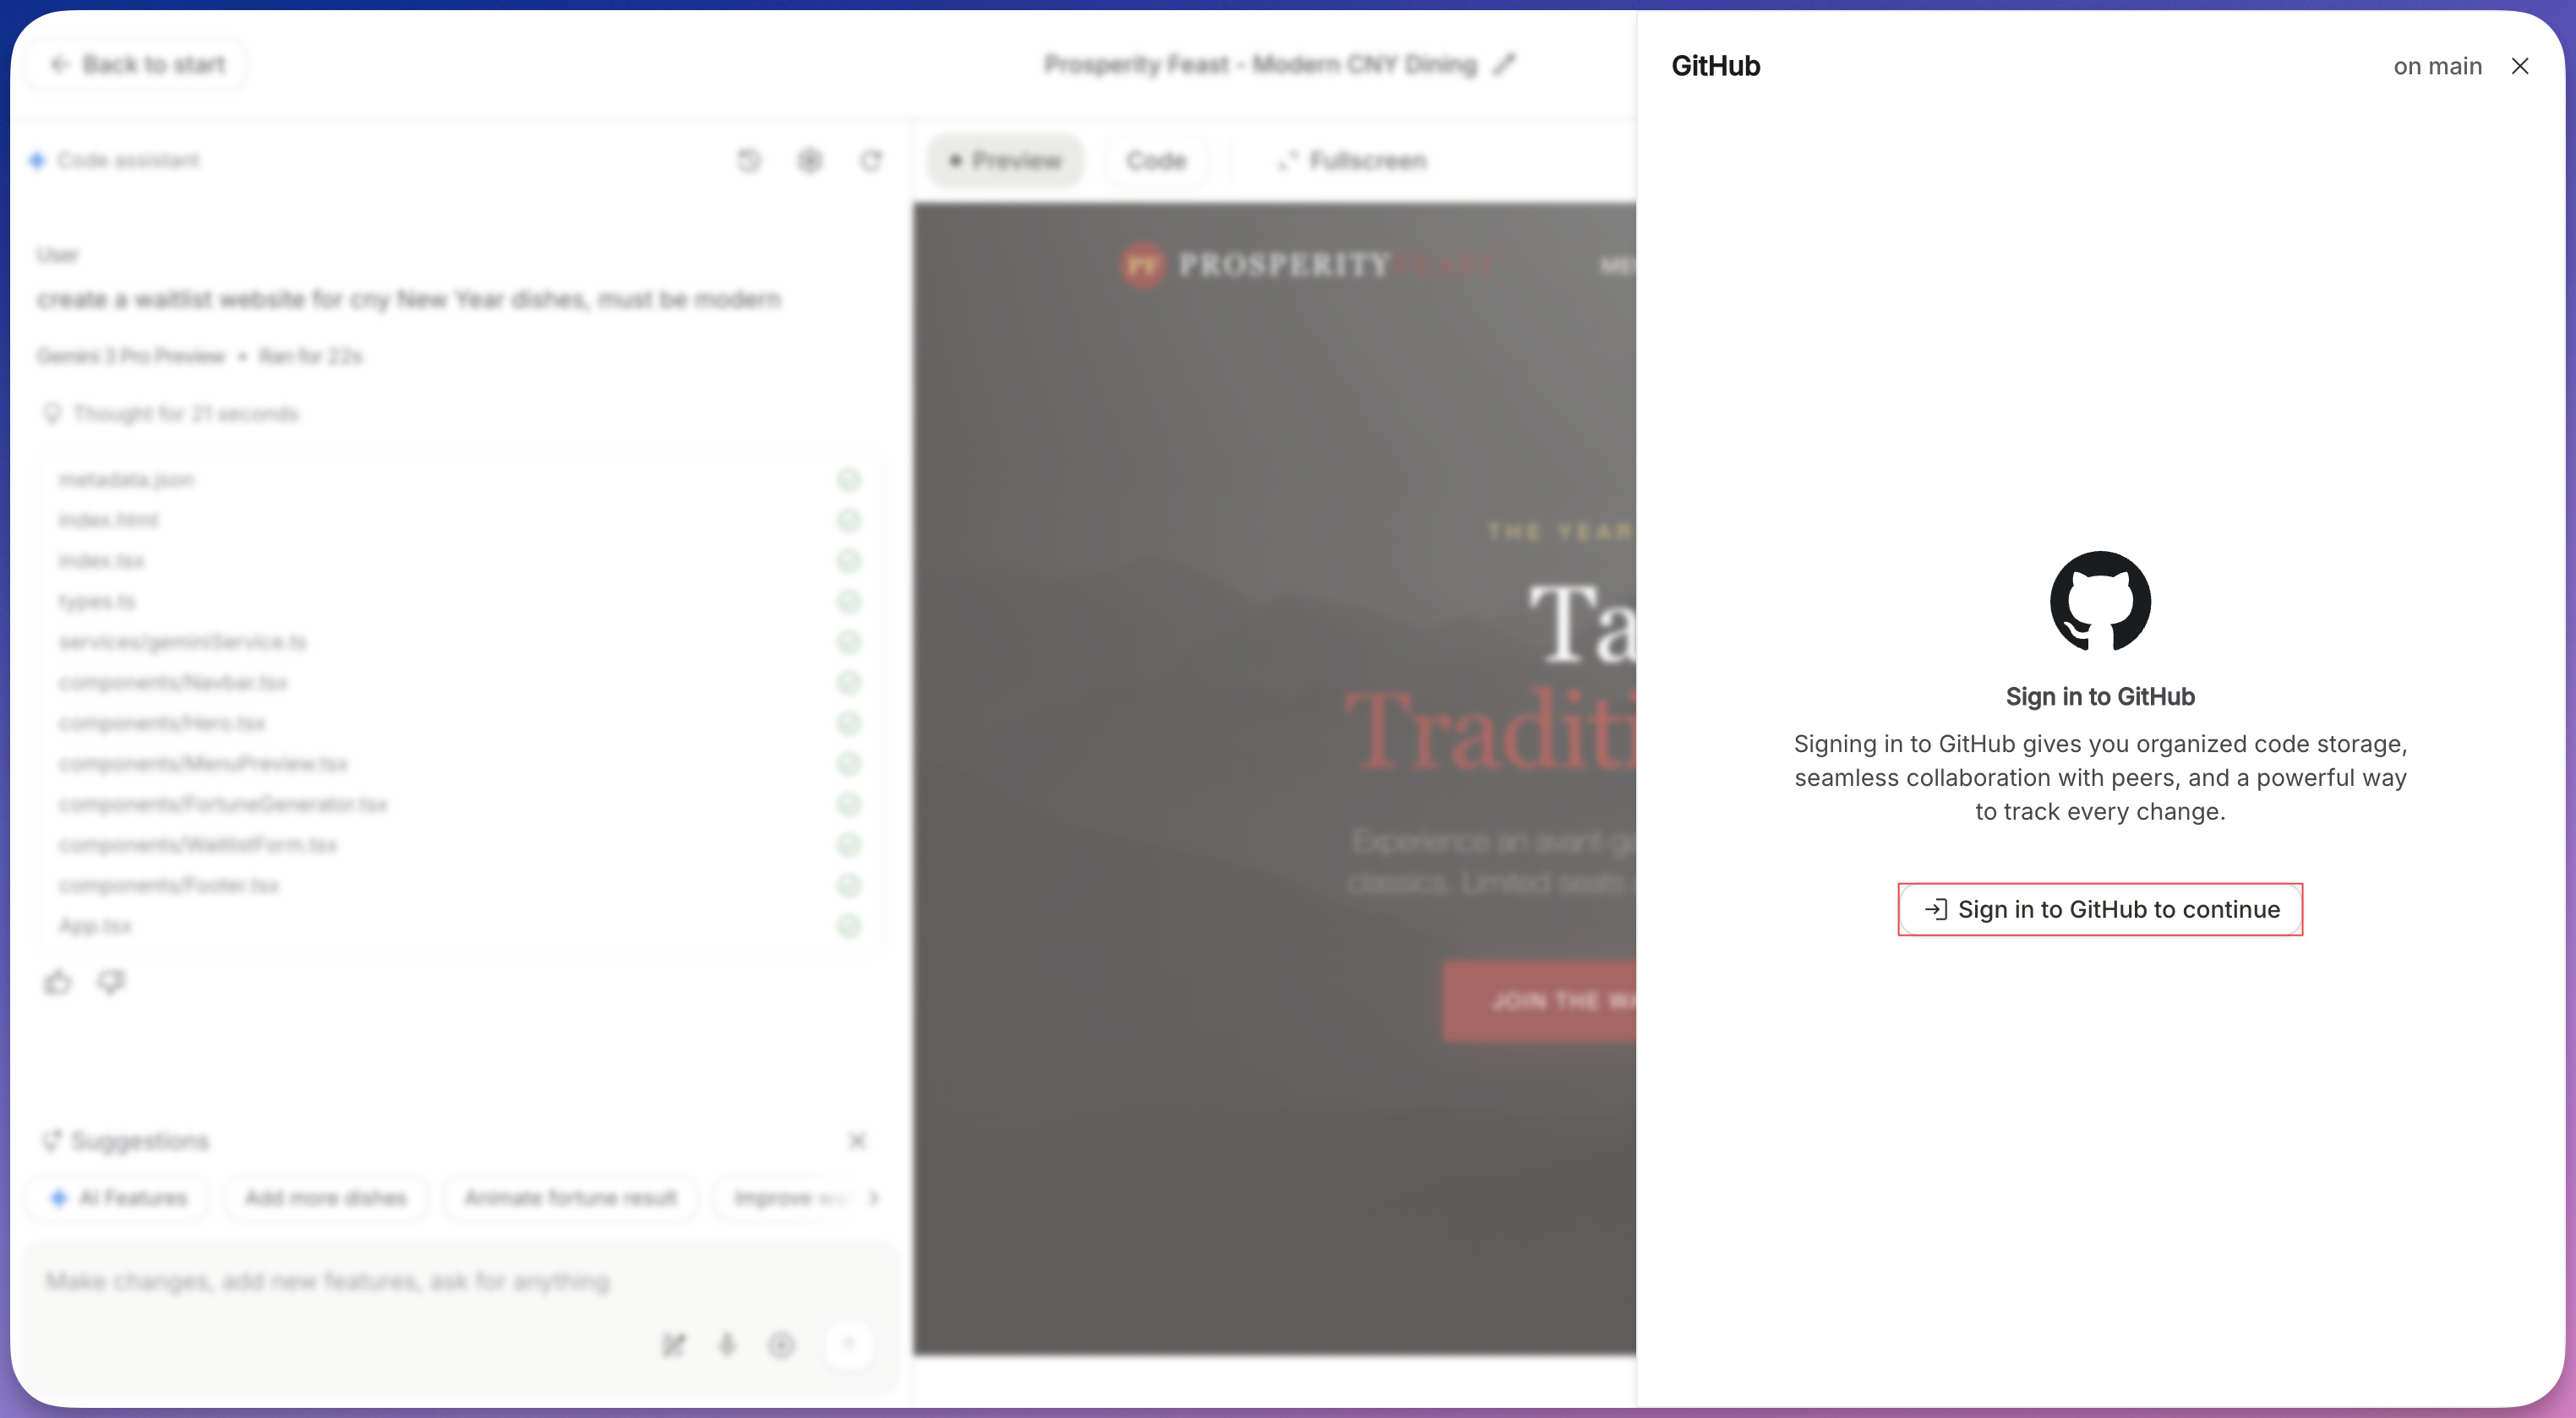
Authorize (First Time Only):
- If you haven’t connected before, a pop-up will ask for permission.
- Click Connect Account and authorize Google AI Studio to create repositories on your behalf.
-
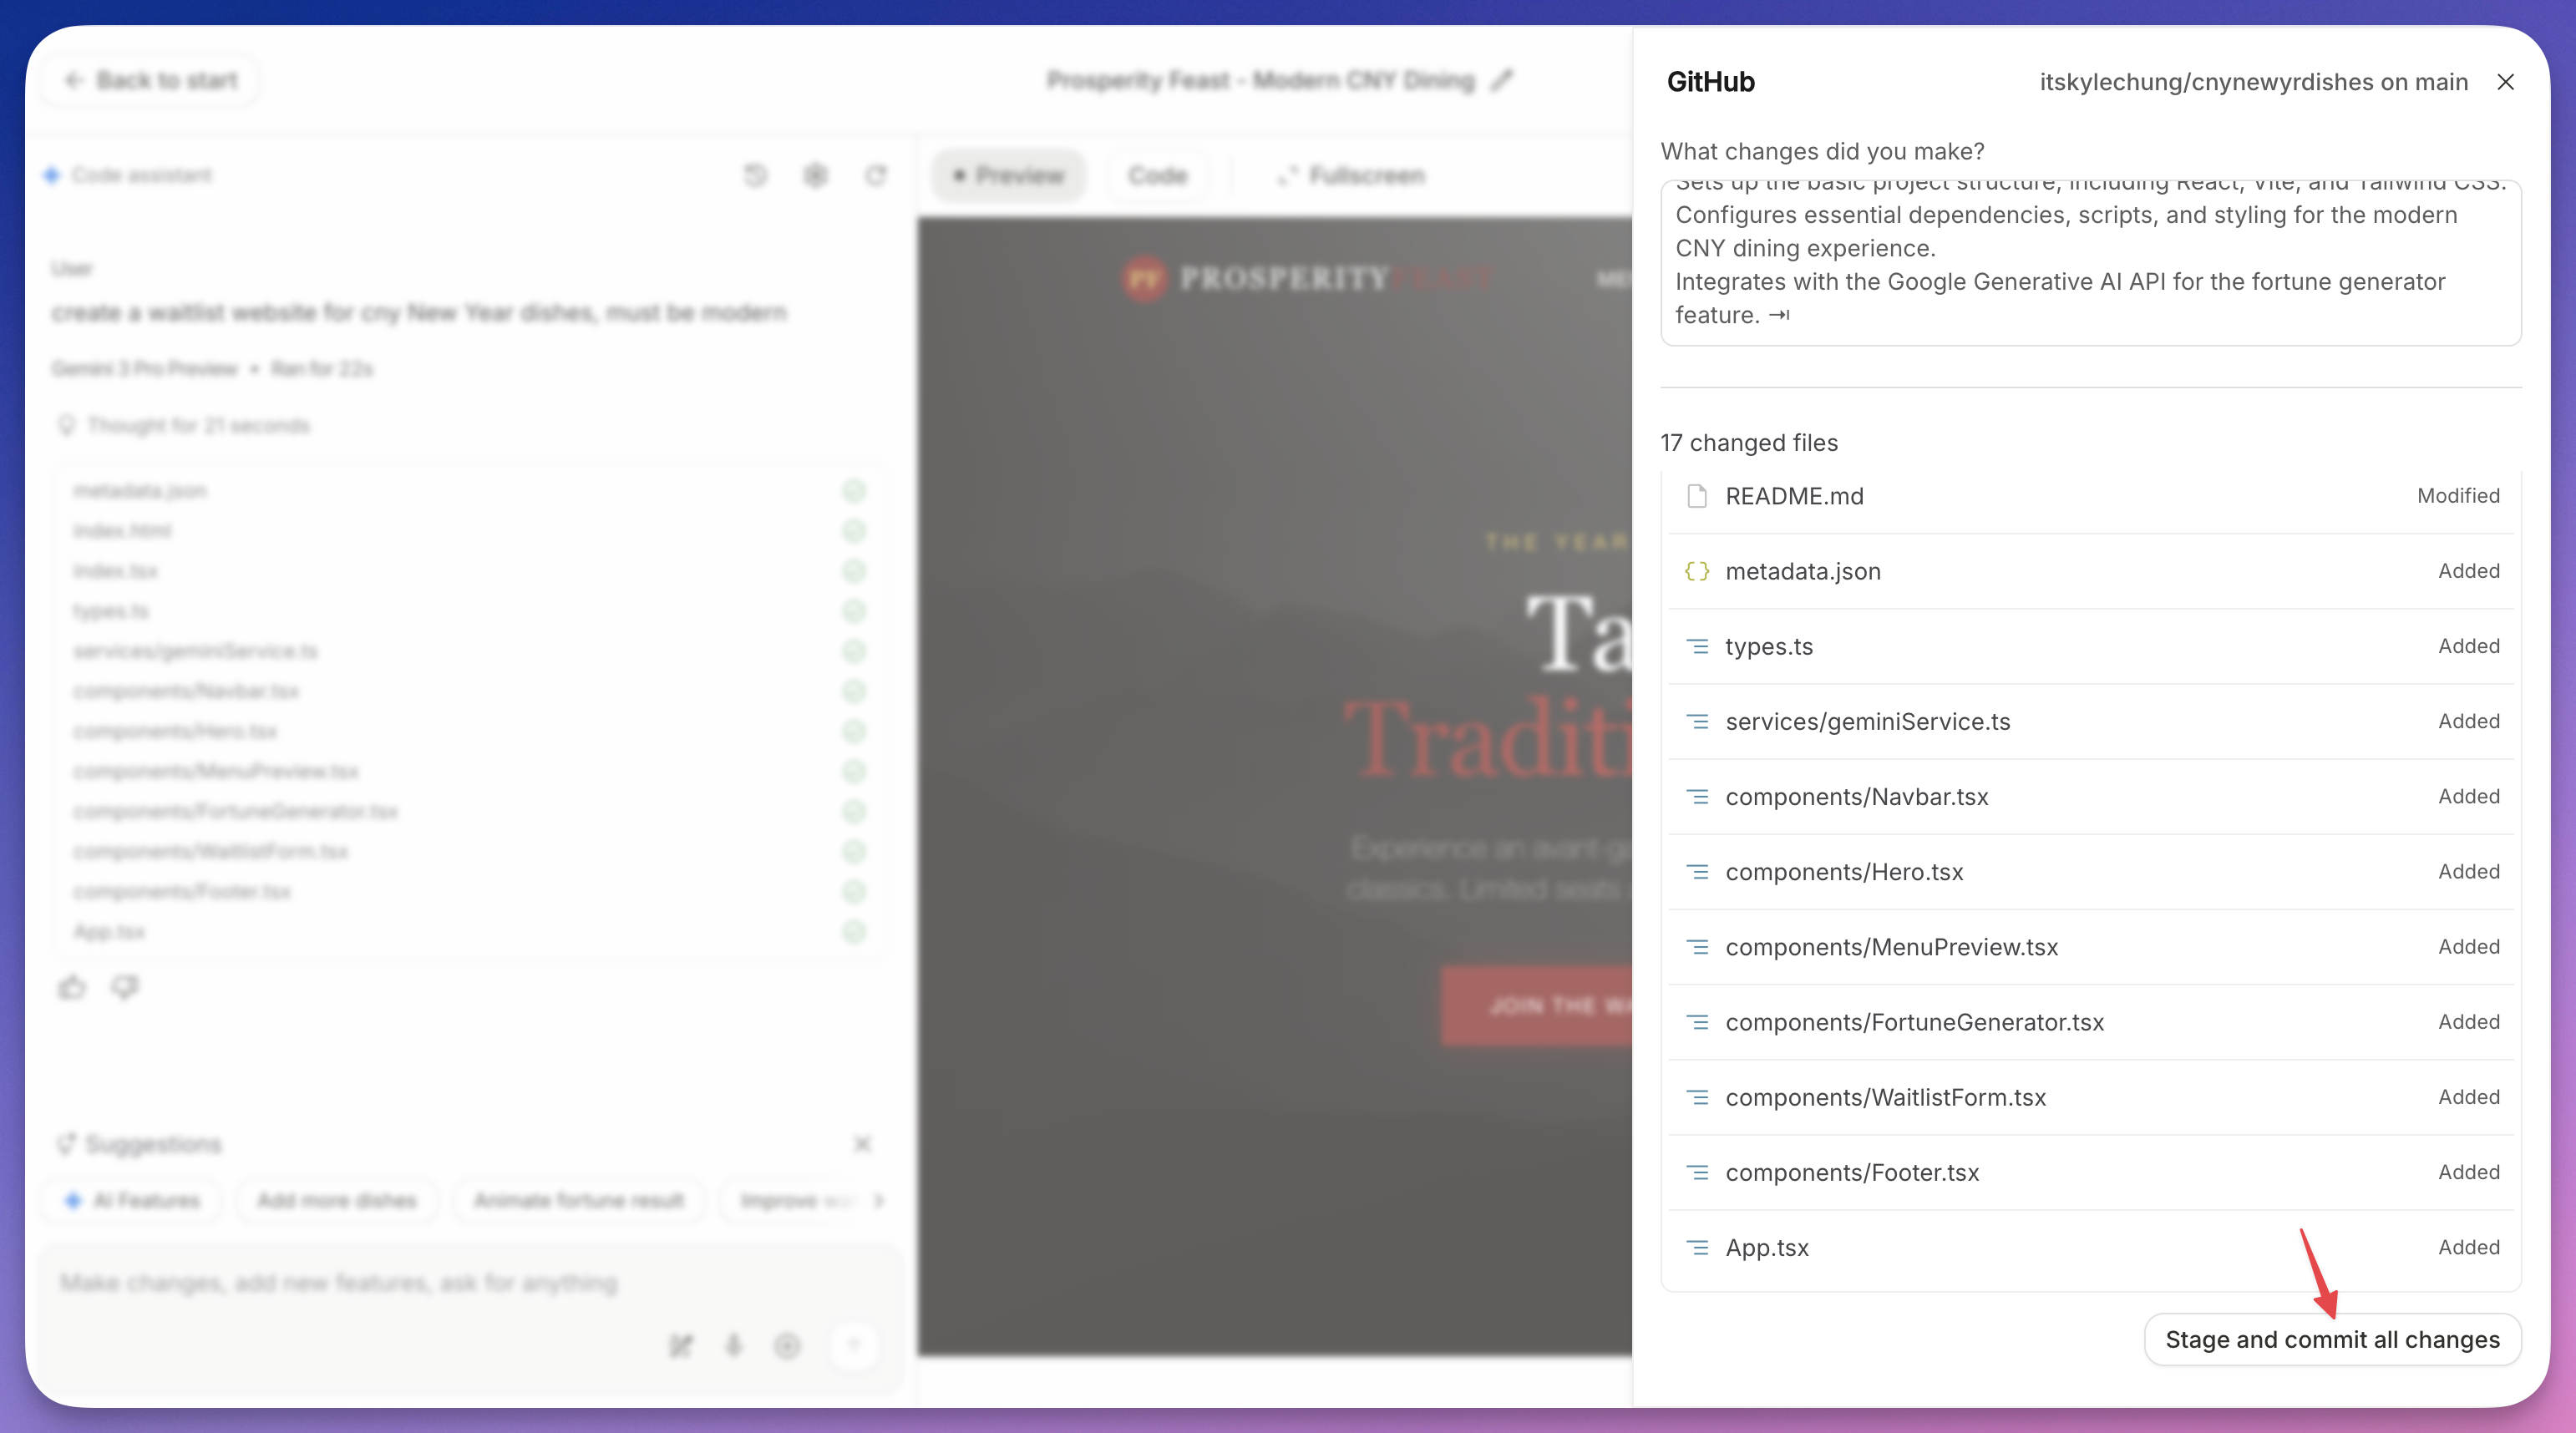
Configure the Repository:
- Repository Name: Enter a clean name (e.g.,
cyberpunk-pomodoro). Note: No spaces allowed. - Description: (Optional) “Generated by Gemini”.
- Visibility: Choose Public (visible to everyone) or Private (only visible to you).

- Click Push.
- Repository Name: Enter a clean name (e.g.,
-
Verify:
- Wait for the success message: “Successfully pushed to GitHub”.
- Click the link provided in the message to open your new repository on GitHub.
Step 3: Set Up Local Environment (Cursor)
Now that the code is on GitHub, you will set it up locally to verify dependencies and make production adjustments.
-
Clone the Repository: Open Cursor, open the Command Palette (
Cmd+Shift+PorCtrl+Shift+P), and type> Git: Clone. Paste your new repository URL.Alternatively, via terminal:
git clone <https://github.com/your-username/your-repo-name.git> cd your-repo-name -
Install Dependencies: AI Studio projects usually detect the package manager automatically. Check for a lock file (
pnpm-lock.yaml,package-lock.json, oryarn.lock).# If using npm npm install # If using pnpm pnpm install -
Environment Setup:
- Locate the
.env.examplefile (if it exists) and duplicate it to create a.envfile. - Important: If your AI Studio app used API keys (Gemini API, etc.), you must manually add these keys to your local
.envfile. AI Studio does not export your secrets to GitHub for security reasons.
- Locate the
-
Local Test: Run the development server to ensure the app works outside the AI Studio sandbox.
npm run dev
Step 4: Open in Local Editor and Install Zeabur Extension
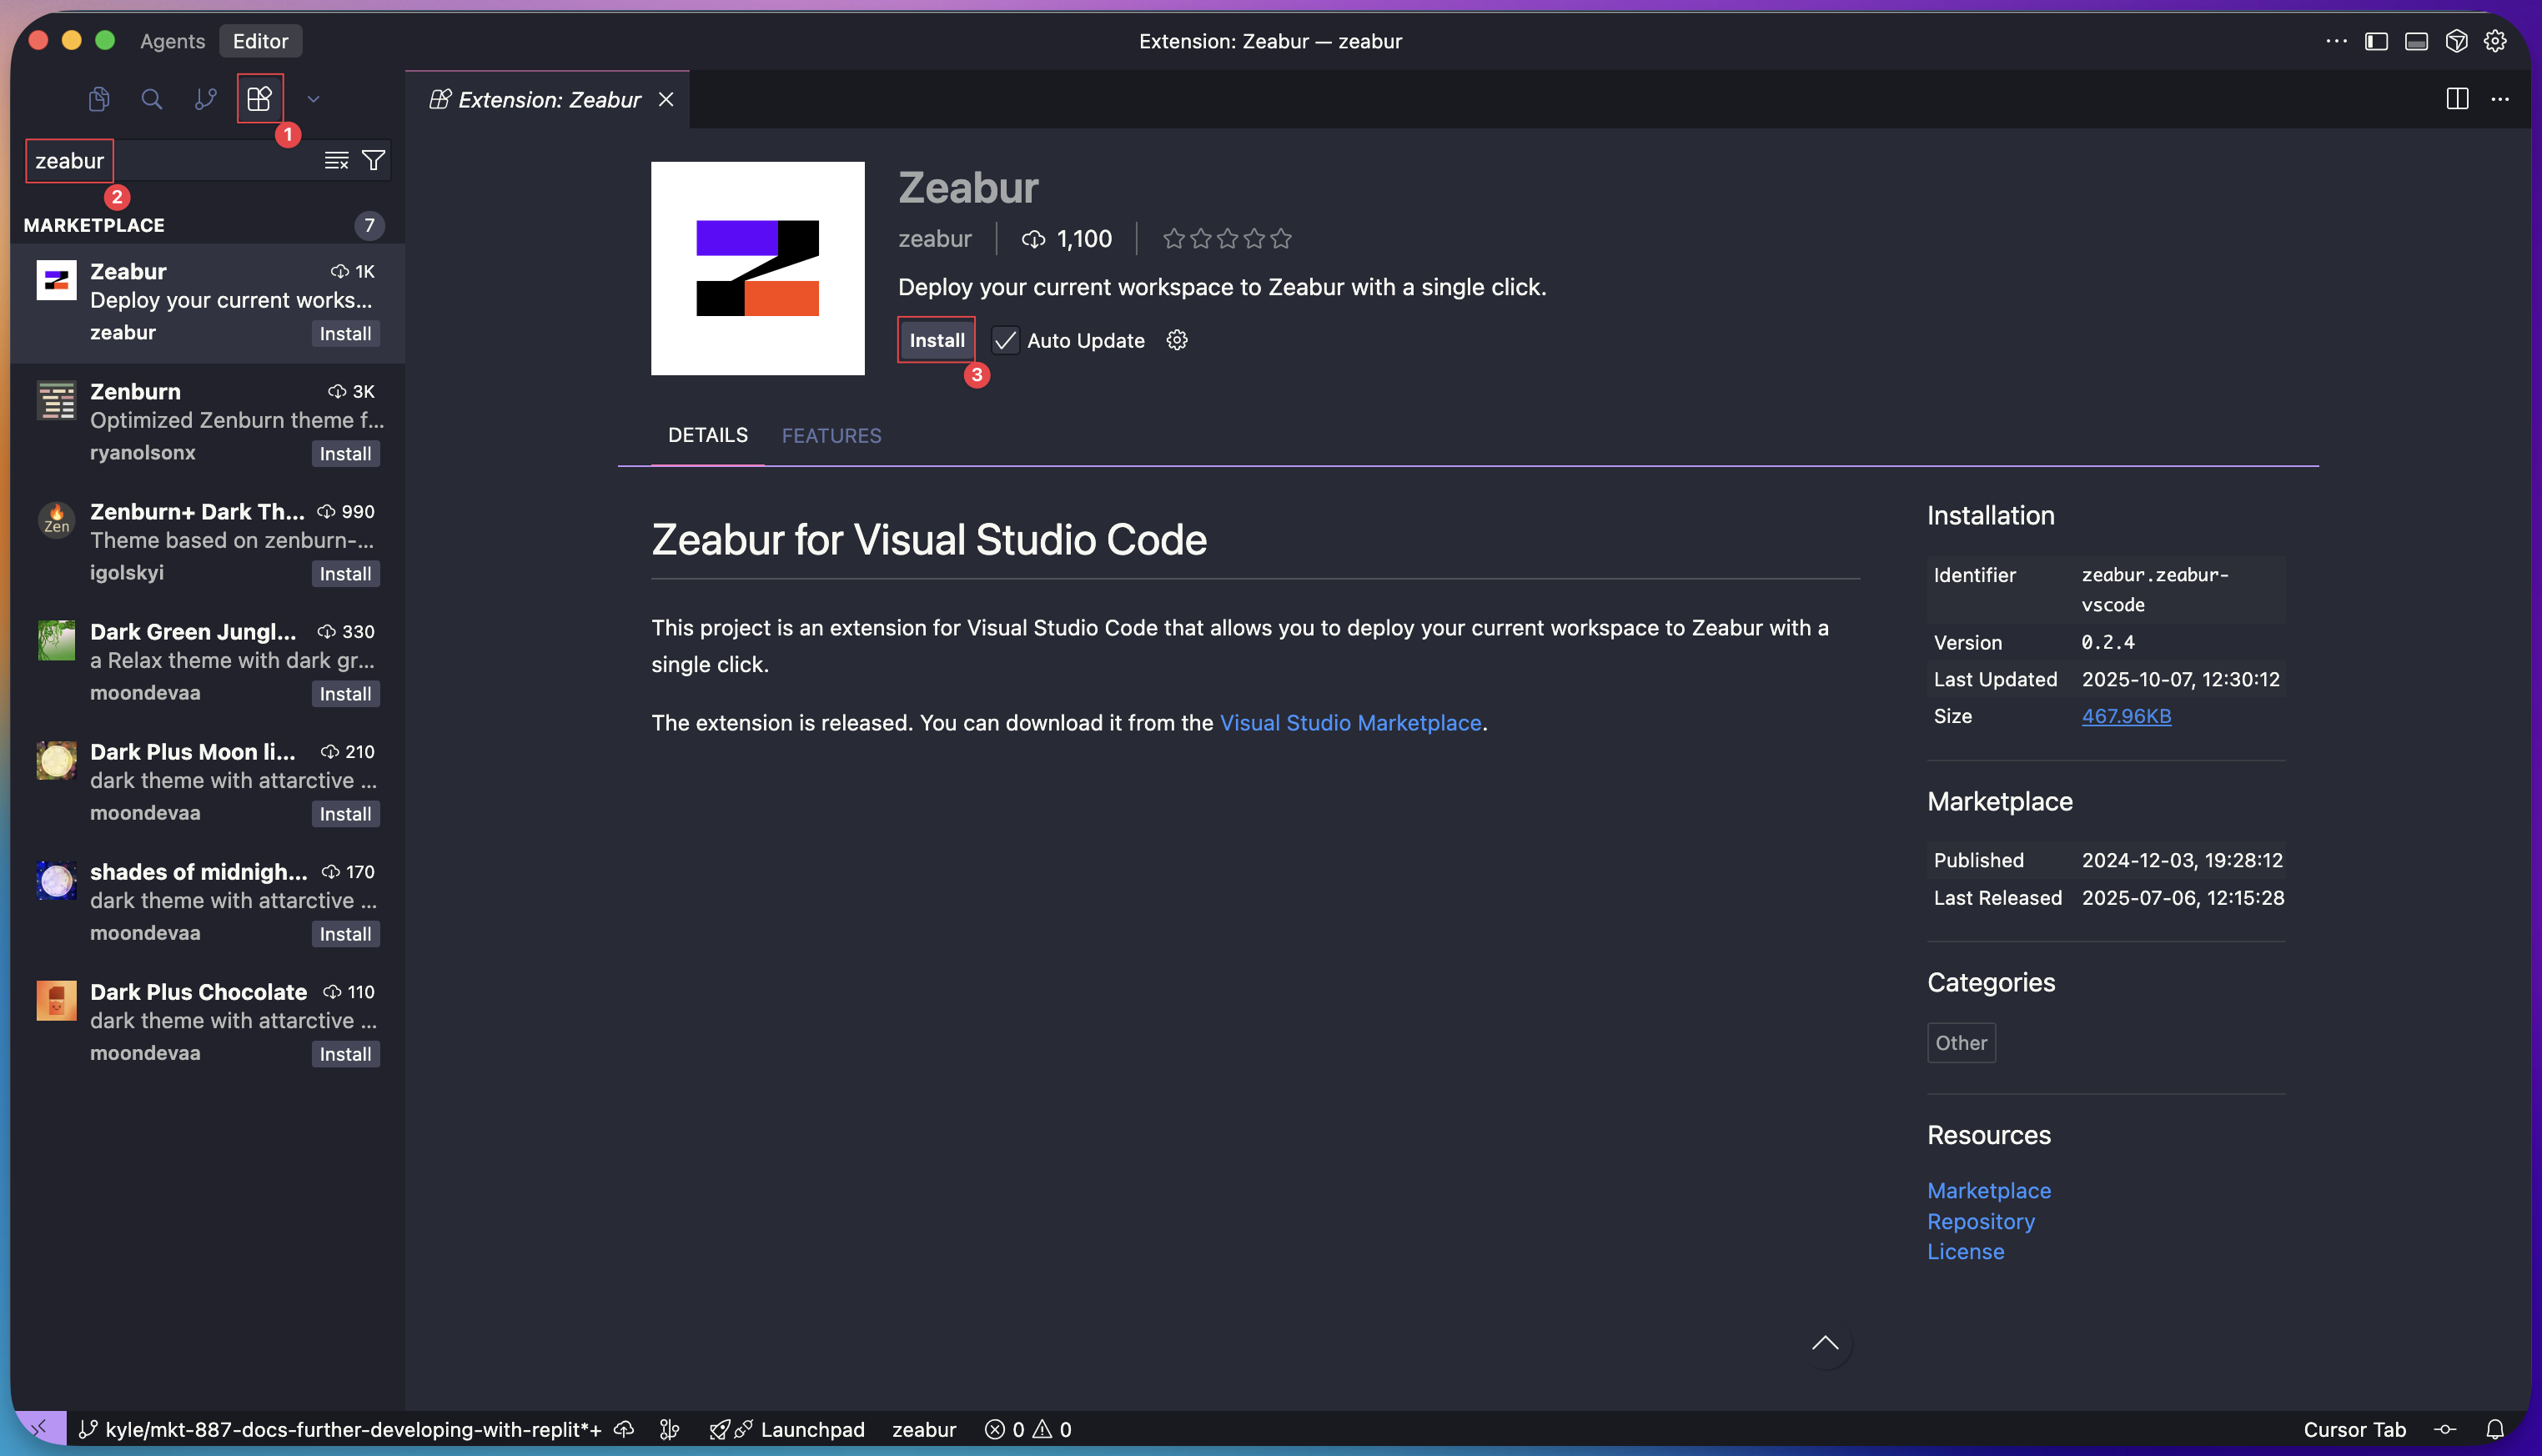
Open the project folder in a local code editor (such as VS Code or Cursor). To make deployment very simple, you will use the Zeabur extension.
- Go to the Extensions Marketplace in your editor.
- Search for “Zeabur” and click Install.
Step 5: Deploy with a Single Click
Now for the magic moment. With the extension installed, deploying your project is just a few clicks away.
- Click the new Zeabur icon in the activity bar on the left.
- Click the “Deploy” button.
Your editor will ask for permission to open a link in your browser. Click “Open”.

Step 6: Let the Zeabur AI Agent Handle the Rest
Once you’re redirected to Zeabur, the platform’s AI agent takes over. It analyzes your code to understand the project’s structure, dependencies, and build requirements.
The Zeabur agent will:
- Recognize that you have a full-stack application (e.g., a React frontend and an Express backend).
- Automatically configure the build and start commands.
- Provision all necessary services.
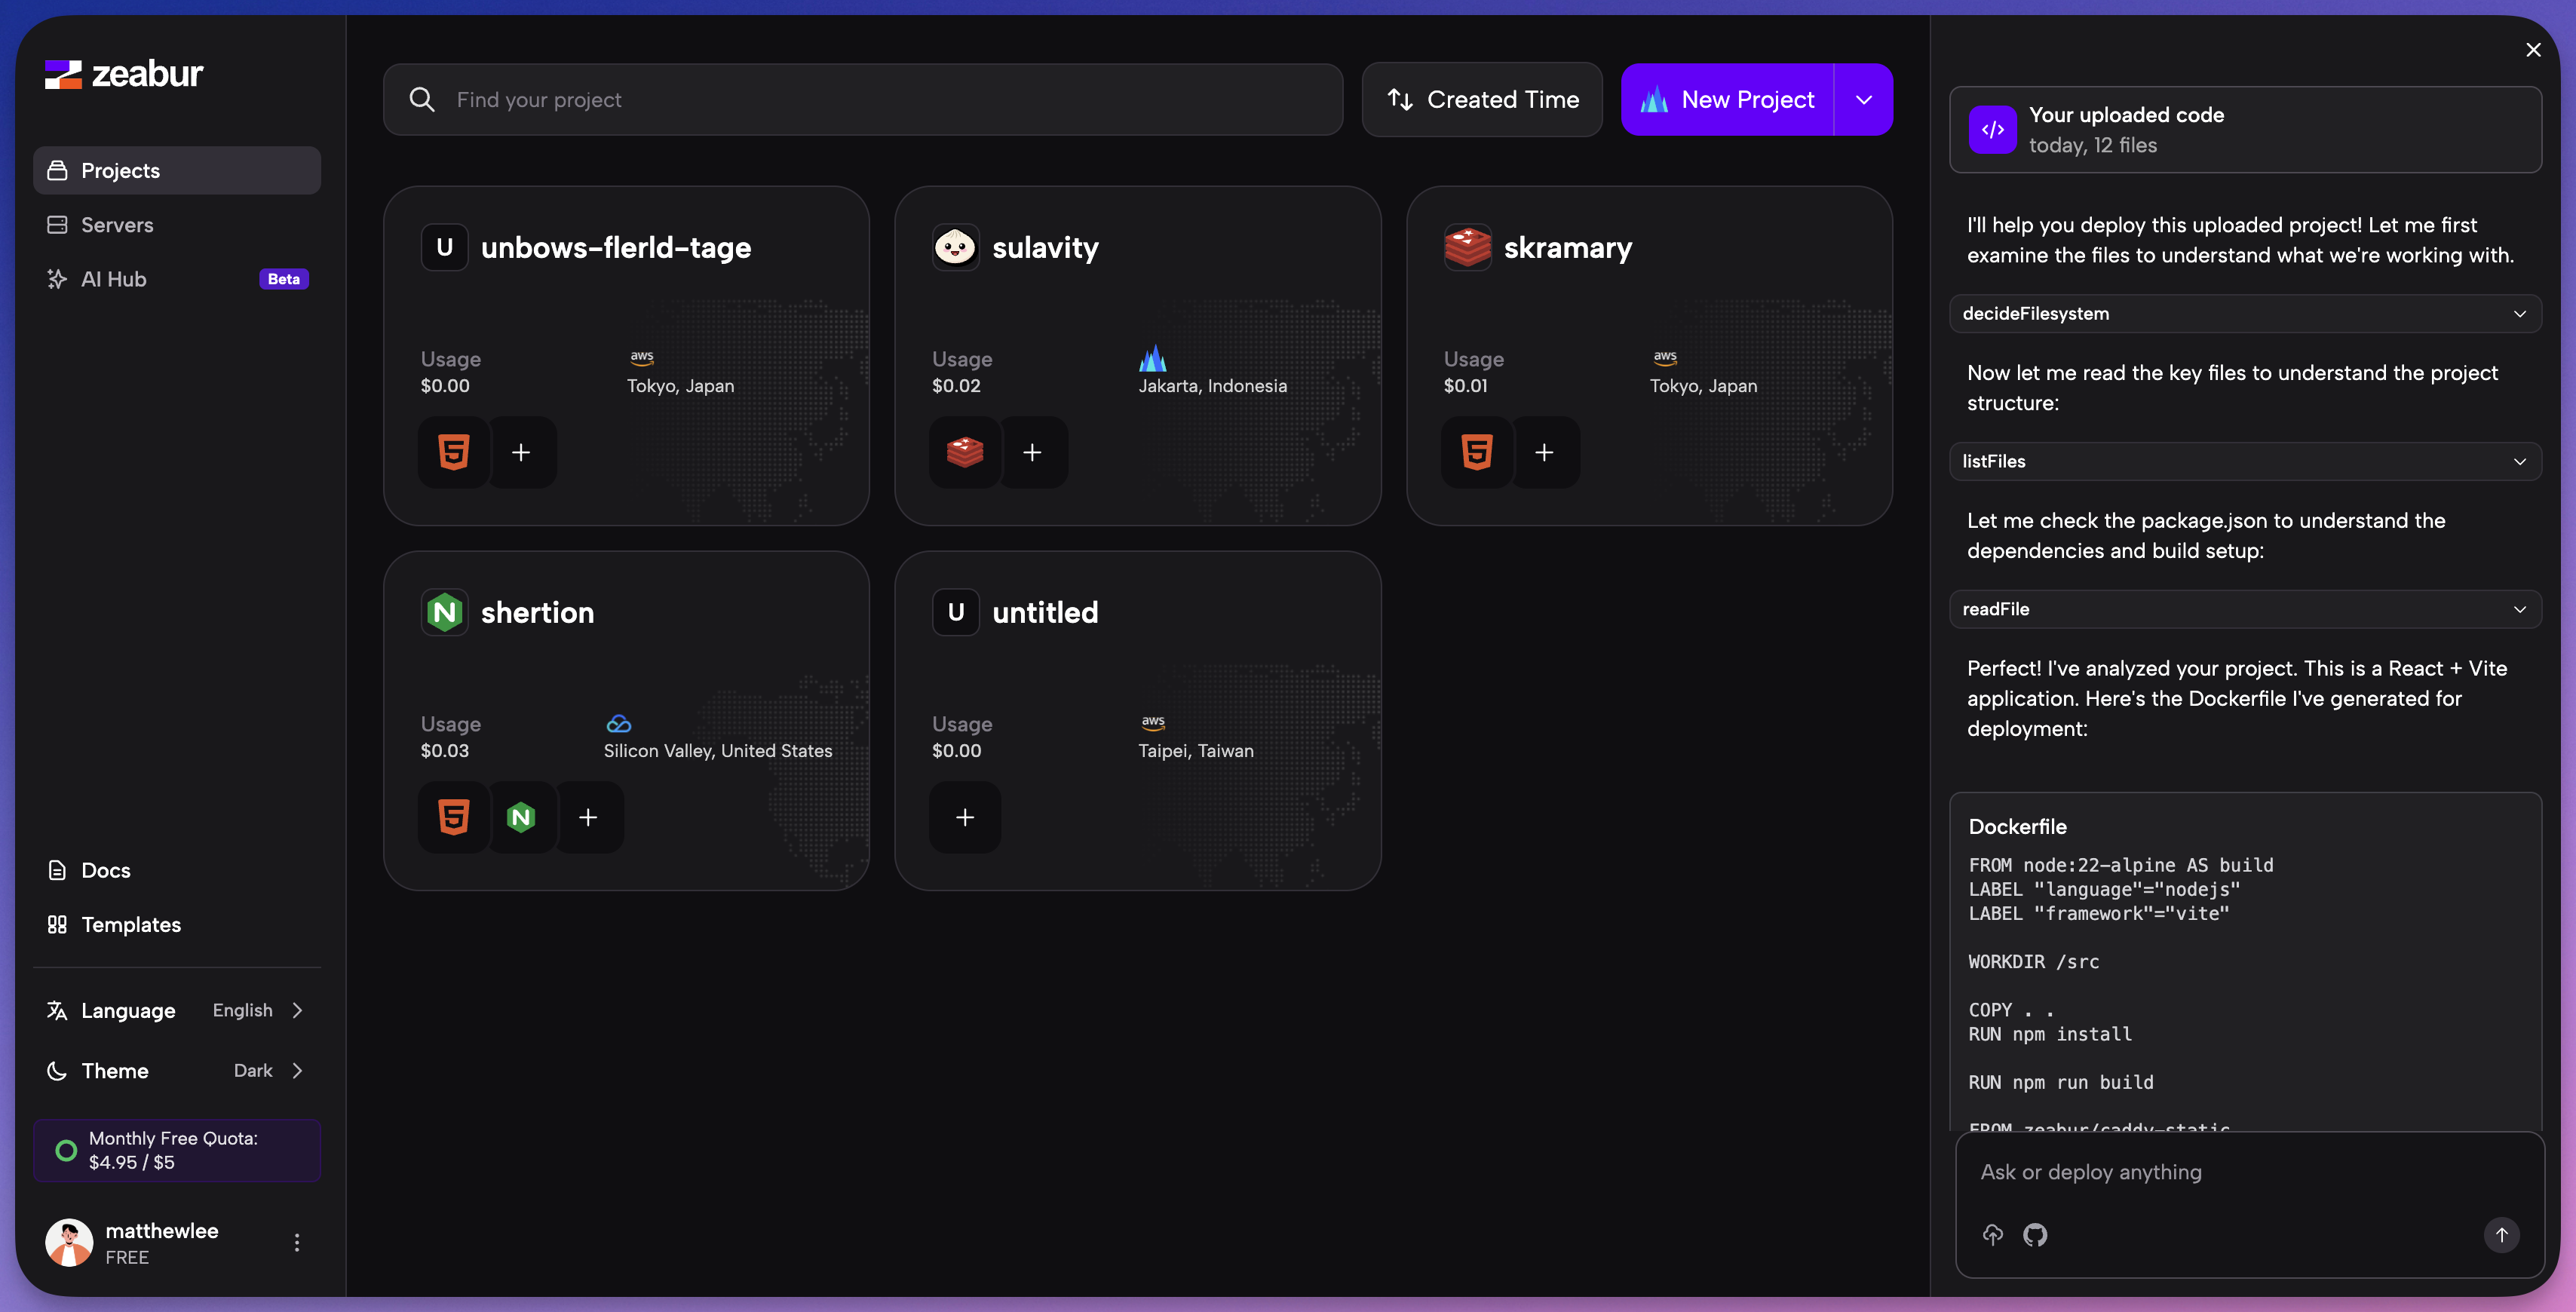
You’ll be prompted to select a project and a deployment region. After that, Zeabur handles everything else.
You can watch in real-time as your service builds and becomes fully operational. Zeabur even provides you with a live domain as soon as the deployment is successful.
Step 7: Domain & Networking
- Click on your service in Zeabur.
- Navigate to the Networking tab.
- Click Generate Domain (to get a
.zeabur.appdomain) or Custom Domain (to connect your own domain). - Visit the URL. Your Google AI Studio application is now a fully deployed production-ready app.
That’s it! You’ve successfully moved your project from a prototype on Google AI Studio to a live, production-ready application on Zeabur without writing a single line of configuration code. This seamless workflow lets you focus on what matters most: building great software.